There are two ways to disable UAC in Windows 10, we will review both.
Option one: Disable UAC via the Control Panel
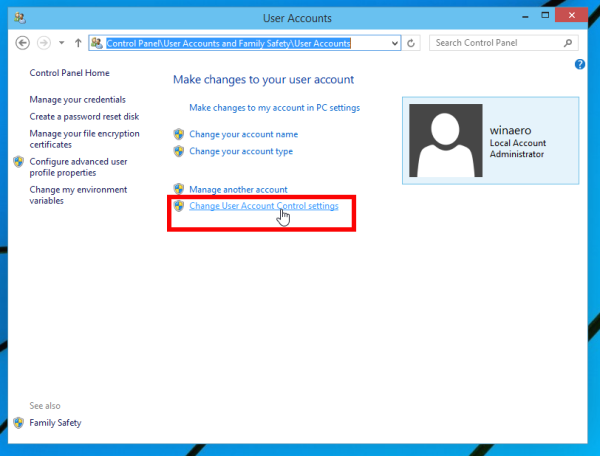
To disable UAC using the Control Panel options, you need to do the following:- Open Control Panel.
- Go to the following path: Control Panel\User Accounts and Family Safety\User AccountsThere you will find the Change User Account Control settings link. Click it.
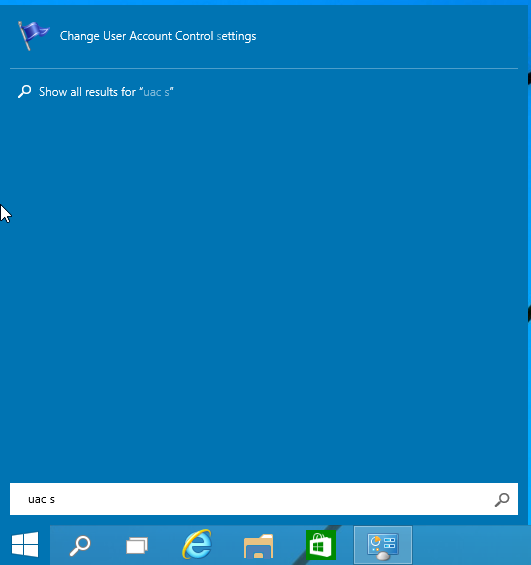
Alternatively, you can click the Start button to open the Start menu and type the following in the Search box:
uac sClick 'Change User Account Control settings' in the search results:
 - In the User Account Control settings dialog, move the slider to the bottom (Never Notify):
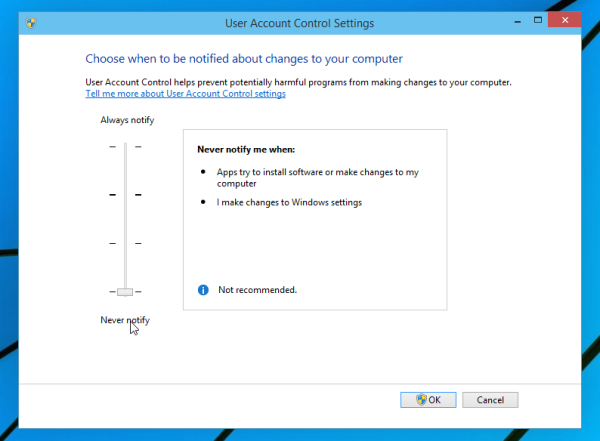
Click OK. This will disable UAC.
Option two - Disable UAC with a simple Registry tweak
It is possible to turn off UAC using the Registry Editor.
- Open Registry Editor.
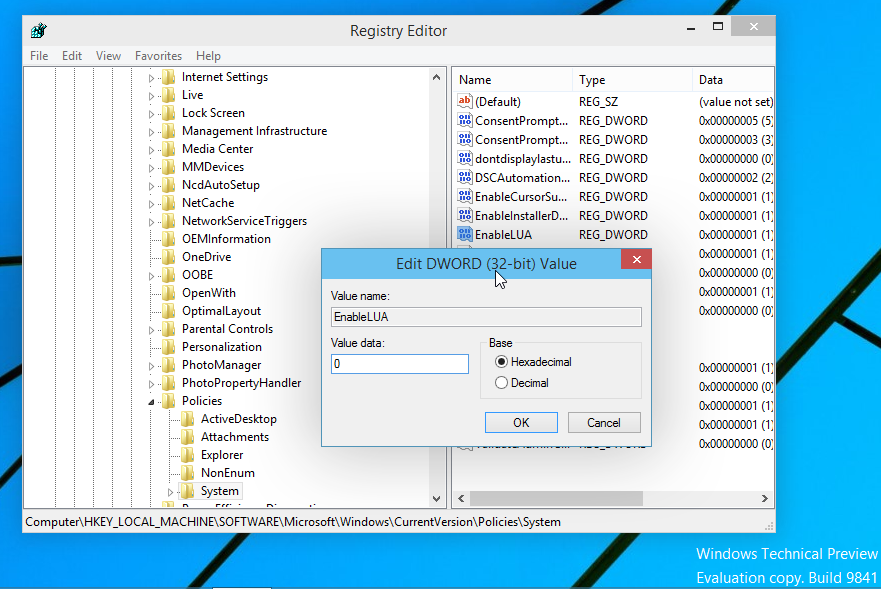
- Navigate to the following key: HKEY_LOCAL_MACHINE\SOFTWARE\Microsoft\Windows\CurrentVersion\Policies\SystemIf you do not have such a Registry key, then just create it.
Tip: You can access any desired Registry key with one click. - In the right pane, modify the value of the EnableLUA DWORD value and set it to 0:
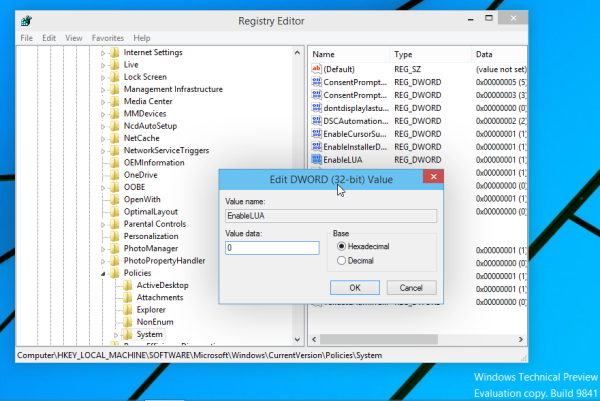
If you do not have this DWORD value, then create it. - Restart your computer.
That's it. Personally I always keep UAC enabled and do not recommend you to disable it. Having UAC enabled is additional protection from dangerous apps and viruses which can elevate silently if it is disabled and do anything malicious on your PC.
Can't save file to C:\ despite changing ownership & access
ANS. disabling UAC which is the way I always run.
Change the following registry key:
HKEY_LOCAL_MACHINE\Software\Microsoft\Windows\CurrentVersion\Policies\System..
Key: EnableLUA
Value data: 0
Note: This prevents Metro/Modern apps or Store from working.
|


 發表於 2016-1-8 09:16:38


 QQ好友和群
 QQ空間
QQ空間 騰訊微博
騰訊微博 騰訊朋友
騰訊朋友 收藏
收藏 轉播
轉播 分享
分享 淘帖
淘帖